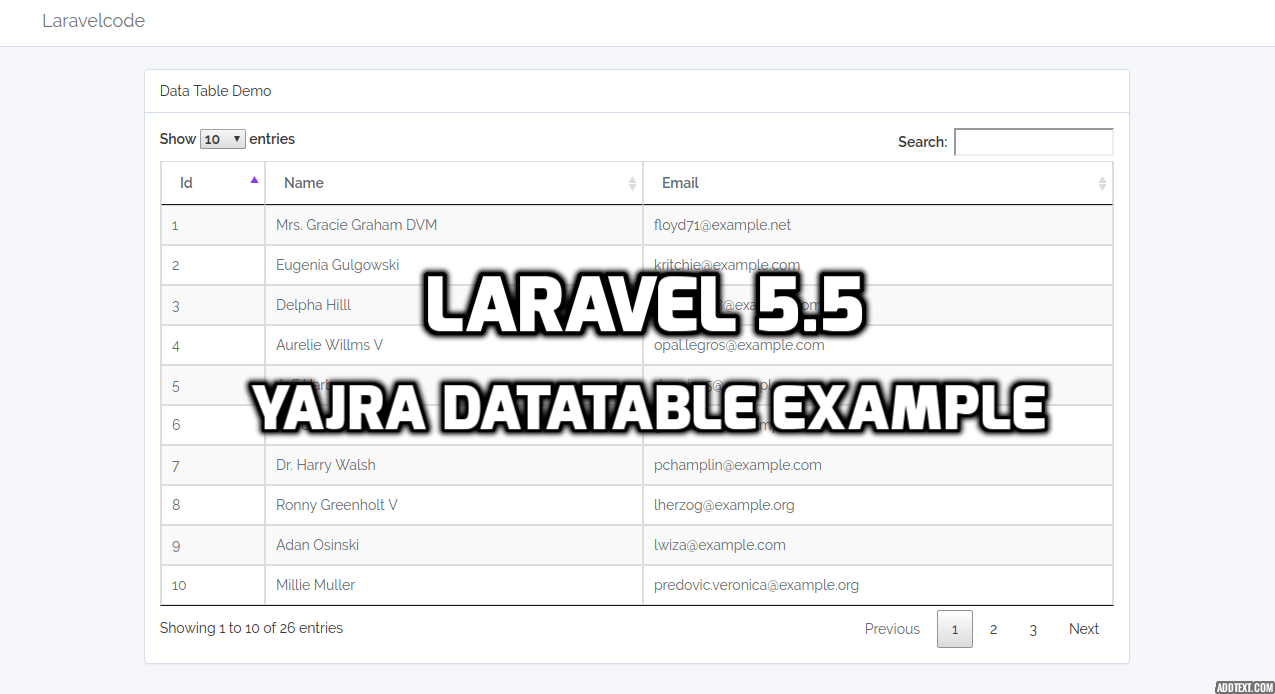
Today, we are share with youu how to implement yajra datatable in laravel application with example. in your application sorting, searching and pagination functionality is common if you use simple table for display your application data iin tabuler forrmate so you should also write manualy code for it all functionality. and it is very painful and take some time.
But, if you use yajra datatable package in your laravel application then you can save this time. because yajra datatable jquery package provide all those functionality ready made nothing else write of single line for it.
yajra datatable provide following functionality for data display in tabuler formate. here listing some basic and core functionality of yajra datatable
1. Pagination 2. Full Searching 3. Data Sorting 4. Data Export, Print
After done this tutorials and you run it your output look like this.

Install Package
First, we need to install yajra/laravel-datatables-oracle package in our laravel application run by following command in terminal.
composer require yajra/laravel-datatables-oracle
Configure Package
Next, configure installed package in application. so, open your config/app.php file and set insstalled package service providers and aliases.
'providers' => [
    ...,
    Yajra\DataTables\DataTablesServiceProvider::class,
]
'aliases' => [
    ...,
    'DataTables' => Yajra\DataTables\Facades\DataTables::class,
]
After set providers and aliases then publish vendor run by following command.
php artisan vendor:publish
Add Dummy Data
Next, we are add some dummy data in users table because we are use this data in datatable tabuler formate for demo.
php artisan tinker
>>> factory(App\User::class, 50)->create();
Create Routes
Next, we need to create following two route. so, open your routes/web.php and create following two route.
// Display view
Route::get('datatable', 'DataTableController@datatable');
// Get Data
Route::get('datatable/getdata', 'DataTableController@getPosts')->name('datatable/getdata');
[ADDCODE]
Create Controller
Next, create DataTableController.php file in app/Http/Controllers folder
namespace App\Http\Controllers;
use Illuminate\Http\Request;
use Illuminate\Support\Facades\Input;
use Redirect;
use DataTables;
use App\User;
class DataTableController extends Controller
{
    public function datatable()
    {
        return view('datatable');
    }
    public function getPosts()
    {
        return \DataTables::of(User::query())->make(true);
    }
}
Create Blade File
Next, create datatable.blade.php file in resources/views/ folder and copy past following code.
@extends('layouts.app')
@section('style')
<link href="https://cdn.datatables.net/1.10.12/css/jquery.dataTables.min.css" rel="stylesheet">
@endsection
@section('content')
<div class="container">
    <div class="row">
        <div class="col-md-10 col-md-offset-1">
            <div class="panel panel-default">
                <div class="panel-heading">Data Table Demo</div>
                <div class="panel-body">
                    <table class="table table-hover table-bordered table-striped datatable" style="width:100%">
                        <thead>
                            <tr>
                                <th>Id</th>
                                <th>Name</th>
                                <th>Email</th>
                            </tr>
                        </thead>
                    </table>
                </div>
            </div>
        </div>
    </div>
</div>
@endsection
@section('script')
<script src="https://cdn.datatables.net/1.10.12/js/jquery.dataTables.min.js"></script>
<script type="text/javascript">
$(document).ready(function() {
    $('.datatable').DataTable({
        processing: true,
        serverSide: true,
        ajax: '{{ route('datatable/getdata') }}',
        columns: [
            {data: 'id', name: 'id'},
            {data: 'name', name: 'name'},
            {data: 'email', name: 'email'},
        ]
    });
});
</script>
@endsection
Now we are ready to run our example so run bellow command ro quick run:
php artisan serve
Now you can open bellow URL on your browser:
http://localhost:8000/datatable
If you want to any problem then please write comment and also suggest for new topic for make tutorials in future. Thanks...


